Painting old wood furniture is a simple yet effective way to revive outdated or worn pieces, giving them a fresh, modern look. Whether you’re an experienced DIYer or a beginner, this process allows you to personalize your furniture while saving money. From proper preparation to selecting the right paint and techniques, learning how to refinish your furniture can breathe new life into your space. In this guide, we’ll walk you through the key steps and expert tips to ensure your project is a success, turning your old furniture into stylish, functional pieces for your home.

1. Tools and Materials Needed for Painting Old Wood Furniture
Before diving into the painting process, it’s essential to gather the right tools and materials for painting old wood furniture. Proper preparation can make or break the success of your project.
- Screwdriver (for hardware removal)
- Sandpaper (120-150 grit for rough sanding, 220 grit for finishing)
- Primer (specific to wood surfaces)
- Paint (latex or oil-based, depending on the desired finish)
- Brushes (different sizes for precision and coverage)
- Tack cloth (to remove dust after sanding)
- Drop cloth (to protect your workspace)
- Painter’s tape (for detailing and clean edges)
Make sure your space is well-ventilated, and if you’re working with painting old wood furniture, have a lead paint test kit handy to check for hazardous materials.

>> Related post: How to Restore Old Wood Furniture Like a Pro in 7 Steps
2. How to Prep Old Wood Furniture for Painting
Preparation is critical when painting old wood furniture. Skipping this step can lead to uneven finishes, peeling paint, and poor durability.
2.1 Testing for Lead Paint
For older pieces, especially pre-1978, lead paint is a real concern. Before sanding or stripping, use a lead test kit to ensure the surface is safe to work on when painting old wood furniture. If lead is detected, consult with a professional on safe removal methods.
2.2 Removing Hardware and Old Paint
Use a screwdriver to remove any hardware such as knobs, pulls, or hinges before painting old wood furniture. Keep these pieces safe if you plan to reuse them. If your furniture has layers of old paint or varnish, you’ll need to remove them before sanding. A paint stripper or heat gun can effectively lift old coatings when painting old wood furniture.
2.3 Sanding for a Smooth Surface
Sanding is vital to achieve a smooth finish while painting old wood furniture. Start with 120-150 grit sandpaper to roughen the surface, especially if the old paint is glossy. This helps the new paint adhere better. If there are intricate details or carvings, use hand sanding for precision while painting old wood furniture. After initial sanding, finish with a finer grit (220) to smooth the surface.
2.4 Cleaning and Priming
After sanding, wipe down the furniture with a tack cloth to remove dust and debris, ensuring a clean surface before painting old wood furniture. Dust can interfere with the primer and paint application, leading to imperfections. Next, apply a quality primer, especially if you’re working with raw or heavily sanded wood. Primer creates a uniform base, blocks stains from seeping through, and improves paint adhesion when painting old wood furniture. Let the primer dry completely before moving to the next step.

2.5 The Best Paint and Brushes for Old Wood Furniture
Selecting the right paint and tools can significantly affect the outcome of your project.
2.6 Choosing the Right Paint
For most furniture projects, latex paint (water-based) is a popular option because it dries quickly and cleans up easily. However, oil-based paints offer a more durable finish, ideal for high-traffic pieces like tables and chairs. Chalk paint is another option, loved for its vintage, matte finish and often requires no priming.
2.7 Selecting the Ideal Brushes
For large surfaces, a high-quality angled brush or a small foam roller ensures even coverage and reduces brush marks. For detailed work or intricate designs, opt for smaller brushes with finer bristles. Synthetic brushes work best with water-based paints, while natural bristles are better suited for oil-based options.
2.8 Step-by-Step Process of Painting Old Wood Furniture
Once your furniture is prepped and your tools are ready, it’s time to get started.
2.9 First Coat Application
Begin by applying the first coat of paint evenly, using long, smooth strokes in the direction of the wood grain. Avoid overloading the brush, as this can cause drips and streaks. Let the first coat dry completely before proceeding to the second.
2.10 Avoiding Streaks
Streaks are a common issue, especially with water-based paints. To avoid them, maintain a wet edge while you paint, meaning you work quickly enough to blend freshly applied paint with the previous stroke. Using a high-quality brush and applying thin coats also minimizes streaks.
2.11 Applying a Second Coat
Most wood furniture will require at least two coats of paint. Once the first coat is fully dry, lightly sand the surface with fine-grit sandpaper (220 grit) to smooth any rough areas, then wipe away dust with a tack cloth. Apply the second coat, ensuring even coverage.
2.12 Sealing for Durability
Although optional, sealing your painted furniture can enhance its durability, especially for frequently used items. Polyurethane, polycrylic, or wax finishes are common sealants that protect the paint from chipping and moisture damage when painting old wood furniture. Apply a thin coat using a clean brush or cloth, and let it dry thoroughly.
3. Common Mistakes to Avoid When Painting Old Wood Furniture
Even with proper guidance, there are a few pitfalls to watch out for when painting old wood furniture:
- Skipping sanding: While some paints claim to be “no-sand,” skipping this step can result in poor adhesion and peeling down the line when painting old wood furniture.
- Using low-quality brushes: Cheap brushes can leave bristles in the paint, causing a rough, uneven surface when painting old wood furniture.
- Not allowing enough drying time: Rushing between coats or sealants can result in a tacky or imperfect finish when painting old wood furniture.
- Ignoring temperature and humidity: Extreme temperatures or humidity can interfere with how the paint dries and adheres during painting old wood furniture.
4. How to Achieve a Vintage Finish on Old Wood Furniture
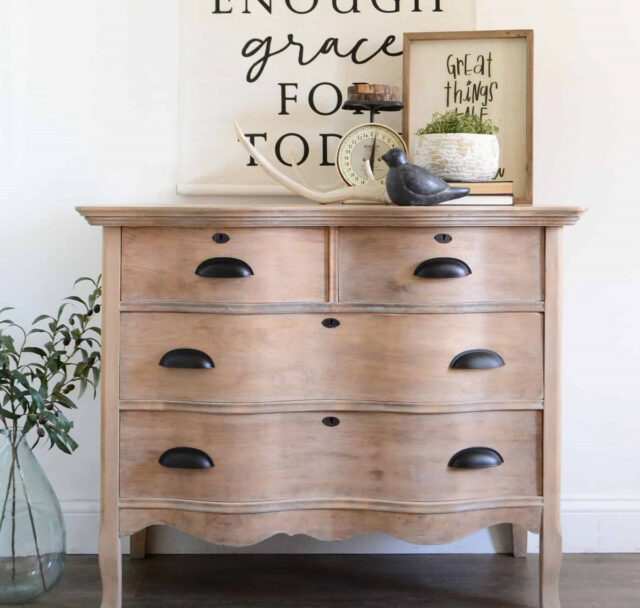
A vintage or distressed look can add character to painting old wood furniture. Achieving this finish requires a bit of creativity and patience.
- Paint and Sand: After applying your paint, use sandpaper to lightly distress areas where natural wear would occur, such as edges and corners when painting old wood furniture.
- Wax Finish: For an antique look, apply a dark wax over your painted furniture. Rub it into the crevices and wipe away excess to give the piece an aged patina while painting old wood furniture.
- Layering Paint: Using two different colors can enhance the vintage effect. Apply one color as a base, and once dry, paint over it with a contrasting shade. Then, sand away sections of the top layer to reveal the base color underneath when painting old wood furniture.
5. Frequently Asked Questions About Painting Old Wood Furniture
Let’s address some common concerns that arise during the process of painting old wood furniture.
Do You Need to Sand Before Painting?
Yes, sanding helps to remove any old finishes and creates a rough surface for the new paint to adhere to. Even if you’re using a paint that claims to require no sanding, lightly scuffing the surface is a best practice for better durability when painting old wood furniture.
5.1 Why Does Paint Peel Off?
Paint can peel off due to several factors, such as insufficient sanding, skipping primer, or painting over dirt or oils. It’s essential to properly prepare the surface by cleaning and sanding before painting old wood furniture.
5.2 Should You Paint the Interior of Wooden Furniture?
Painting the interior is optional and depends on your preference. For pieces like cabinets or dressers, painting the interior can create a more polished look, but it’s not necessary for functionality. Consider leaving it unpainted if the inside is in good condition or has a unique wood grain when painting old wood furniture.

6. Tips for Maintaining and Caring for Painted Wood Furniture
Once your furniture is beautifully painted, proper care will ensure it lasts for years after painting old wood furniture.
- Clean Gently: Use a soft cloth and mild soap to clean painted furniture. Avoid harsh chemicals or abrasive scrubbing pads that can damage the finish after painting old wood furniture.
- Avoid Direct Sunlight: Over time, prolonged exposure to sunlight can fade the color or cause yellowing in light-colored paints after painting old wood furniture.
- Protect Against Moisture: Be mindful of placing water-filled items like vases or cups directly on painted surfaces. Use coasters and wipe up spills immediately to prevent damage after painting old wood furniture.
>> Related post: Top Furniture Factories in Vietnam 2024
7. Conclusion
Painting old wood furniture is a fantastic way to transform pieces that may otherwise be discarded. Whether you’re going for a modern, sleek look or a vintage, distressed finish, taking the time to properly prepare, paint, and seal your furniture will result in beautiful, long-lasting results. By following the steps outlined in this guide, you can confidently tackle your next DIY project, knowing you’re equipped with the expertise to succeed. With the right care, your newly painted furniture will be a treasured piece in your home for years to come.
Painting Old Wood Furniture
Painting old wood furniture is a great way to transform outdated pieces into stylish, functional furniture. Whether you’re refreshing a family heirloom or revamping a thrift store find, this DIY project allows you to customize your furniture to match your home’s aesthetic. With the right preparation, tools, and techniques, you can achieve a professional-looking finish that revitalizes your space. For high-quality furniture and expert advice, check out QF – Factory Direct Furniture, where you’ll find a wide selection of beautifully crafted pieces. For more updates and inspiration, connect with Q-Furniture LinkedIn to stay in the loop with the latest trends in furniture design.